EurocoinPay: Everything you need to know to get started
As we mentioned in our previous article, here is a tutorial with the steps to follow to create a EurocoinPay account.
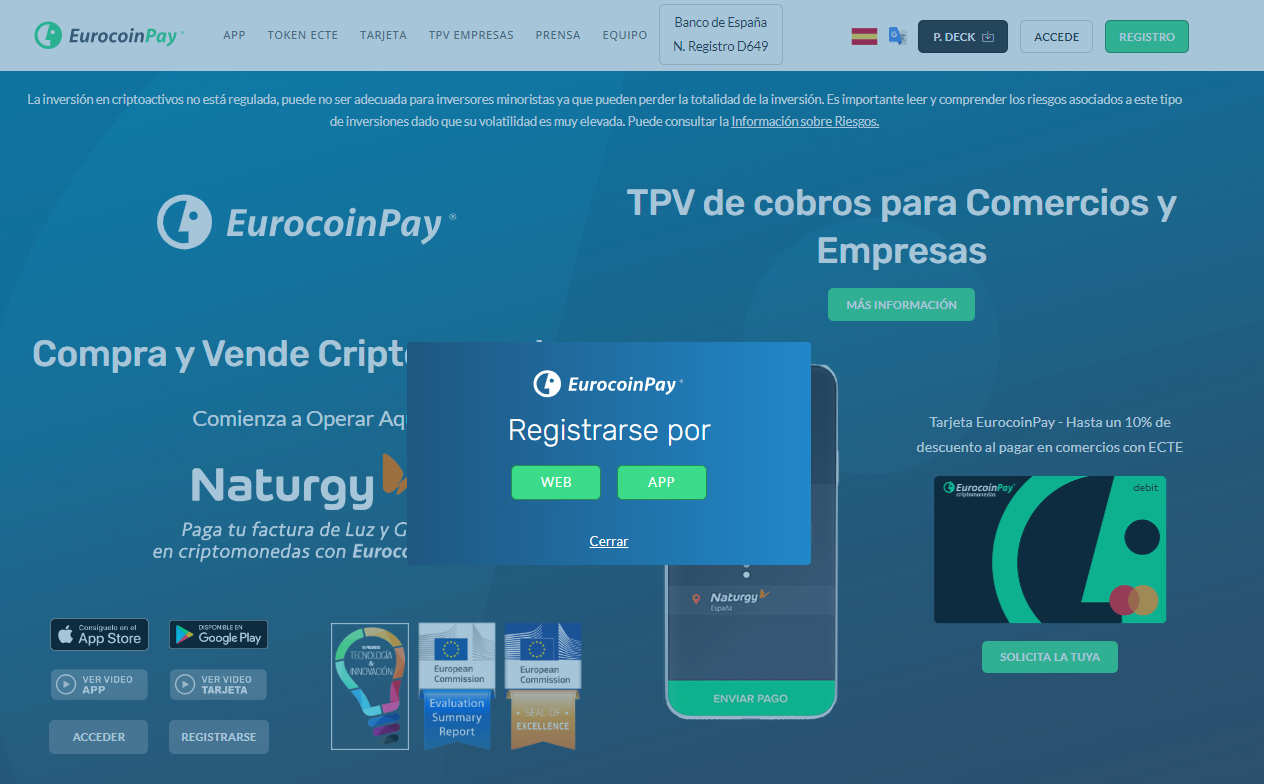
Step 1: Access the official EurocoinPay website in your web browser: https://www.eurocoinpay.io/
Step 2: Click on the «Register» button on the home page. You can then select whether you want to register via the browser itself or via the application, if you choose the second option you must continue from the mobile. For this tutorial, we will follow the web browser option.
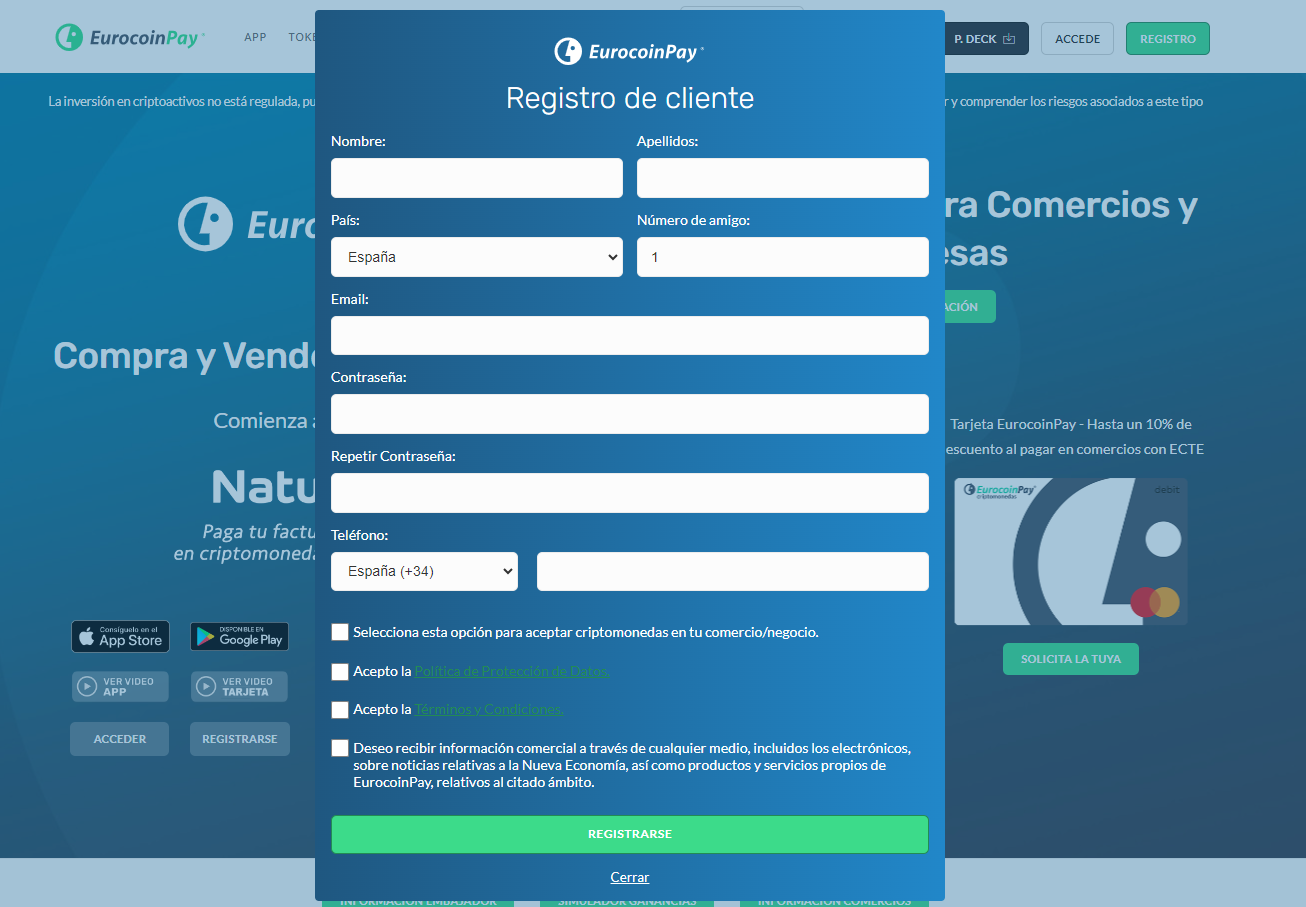
Step 3: Fill in the registration form with your personal information, including name, email address and a secure password. Be sure to read and accept the terms and conditions of use.
Step 4: After completing the form, you will receive a registration confirmation email with your customer number.
Step 5: Once your account is activated, return to the EurocoinPay home page and log in with your email and password.
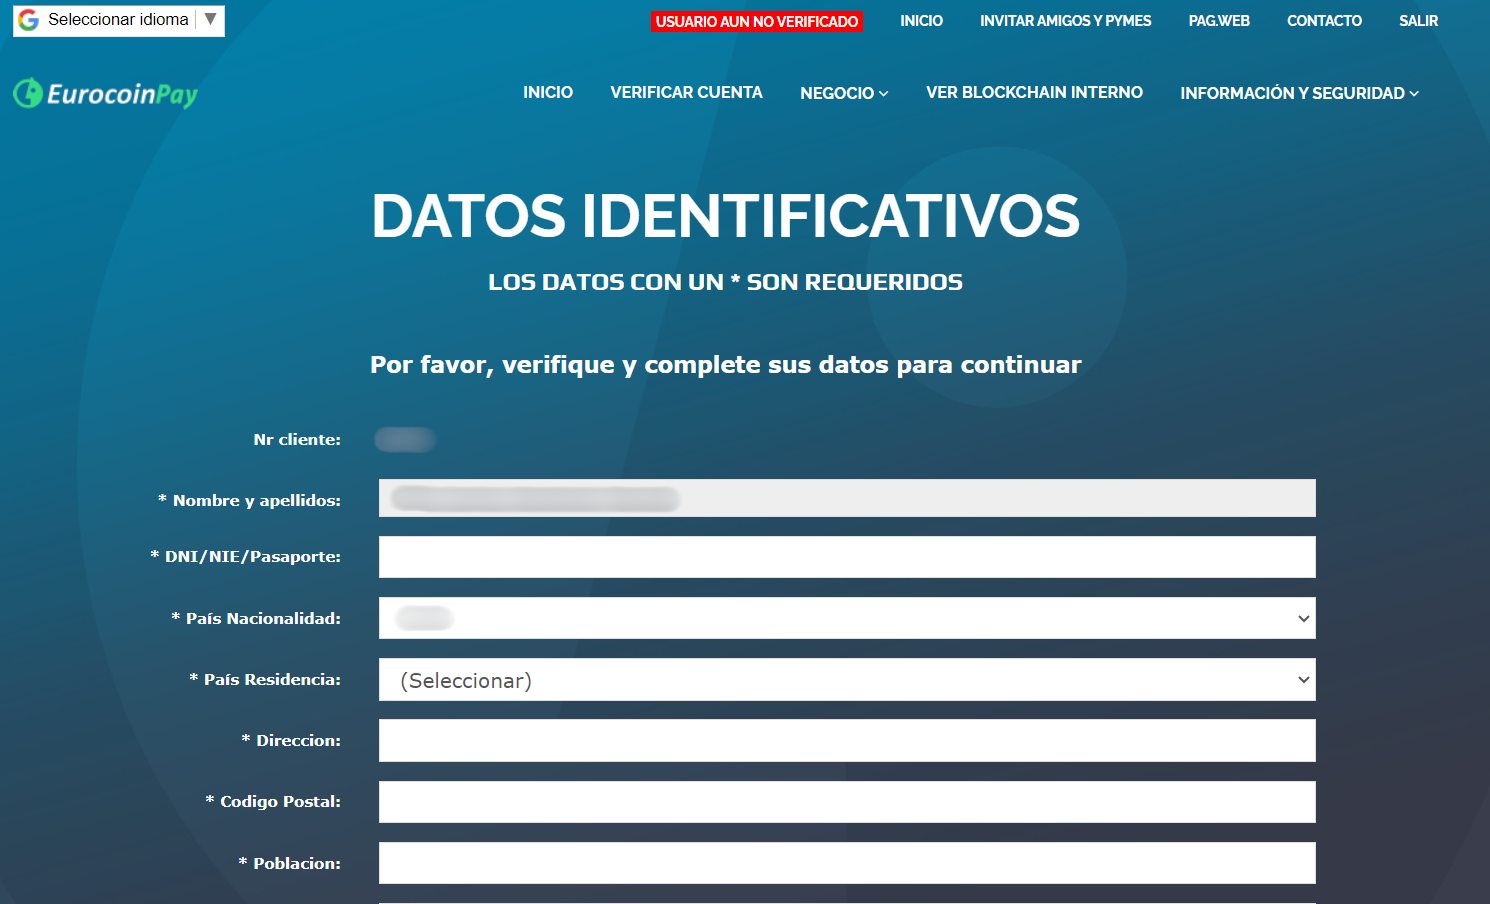
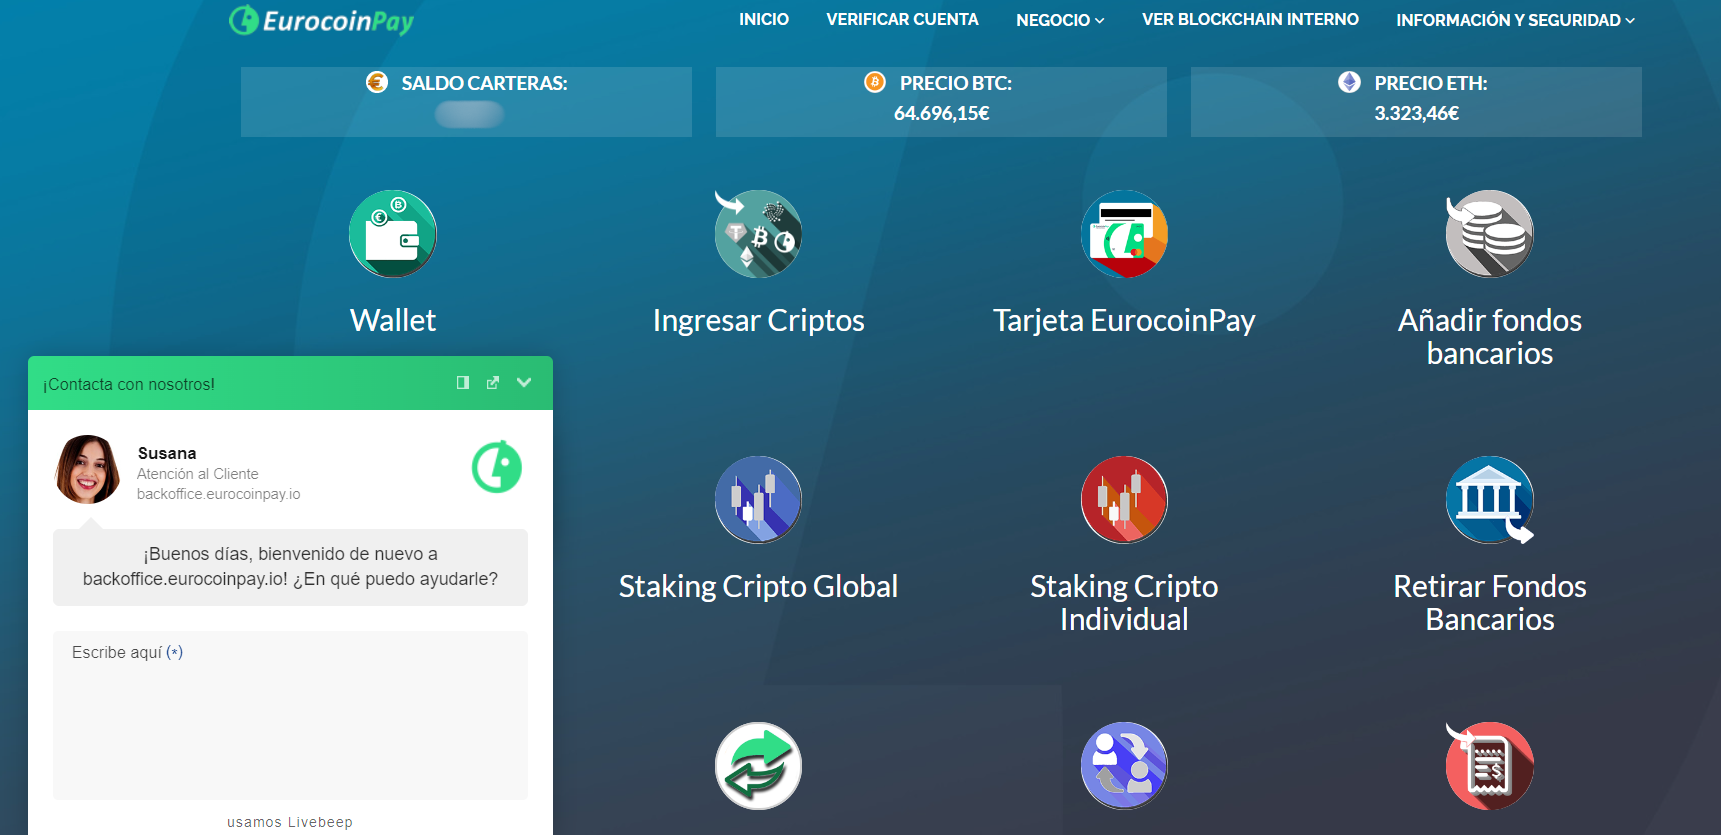
Step 6: The first thing you need to do to get started is to verify your identity. Click on the option VERIFY ACCOUNT and complete the form.
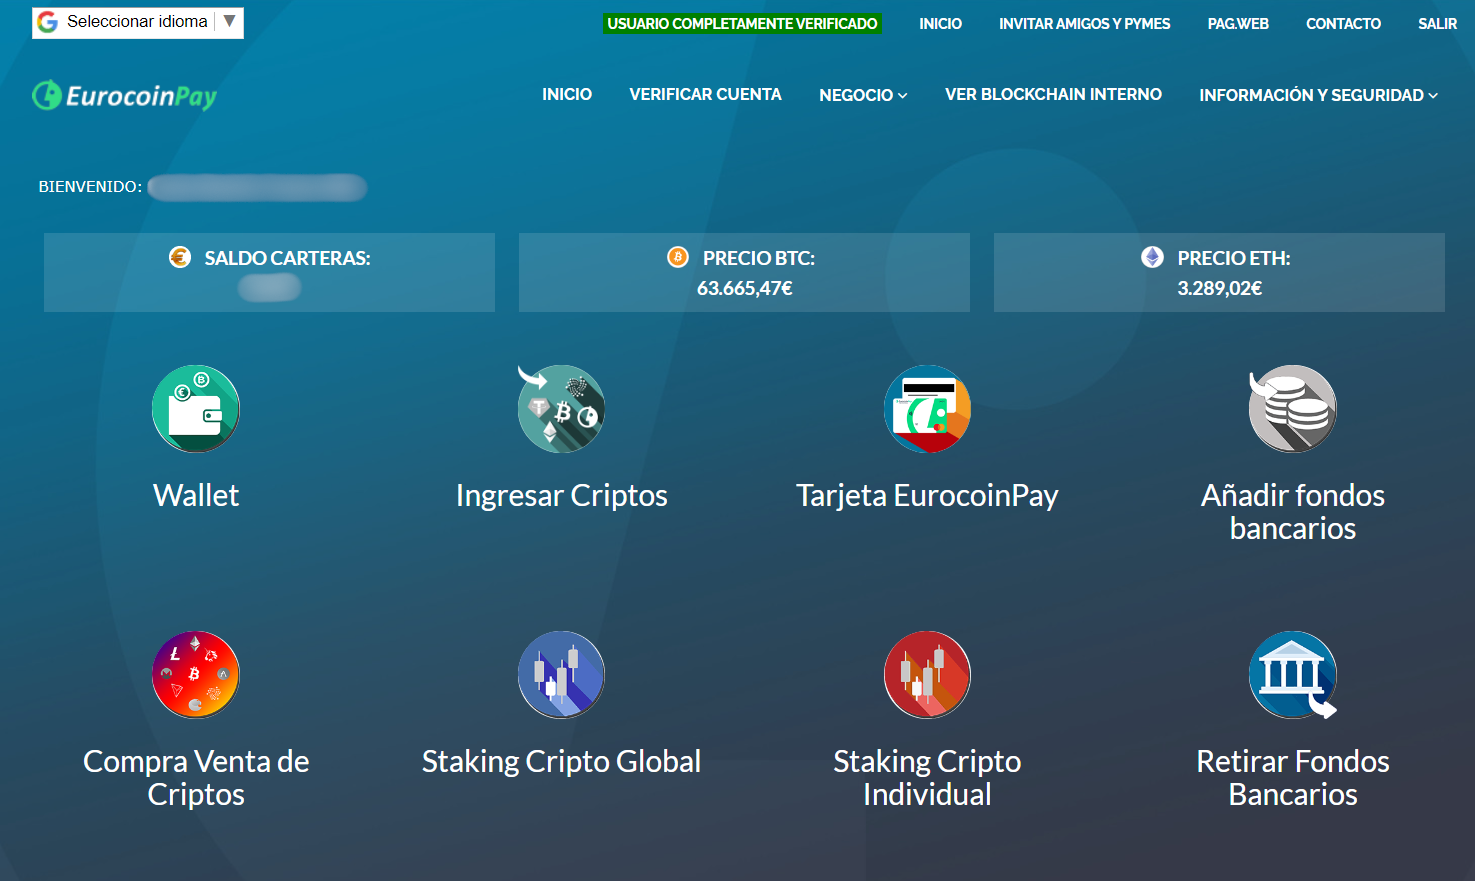
Step 7: Once you verify your identity, you will be able to use the different options and features offered by the platform, such as the cryptocurrency wallet, exchange and trading options and payment tools.
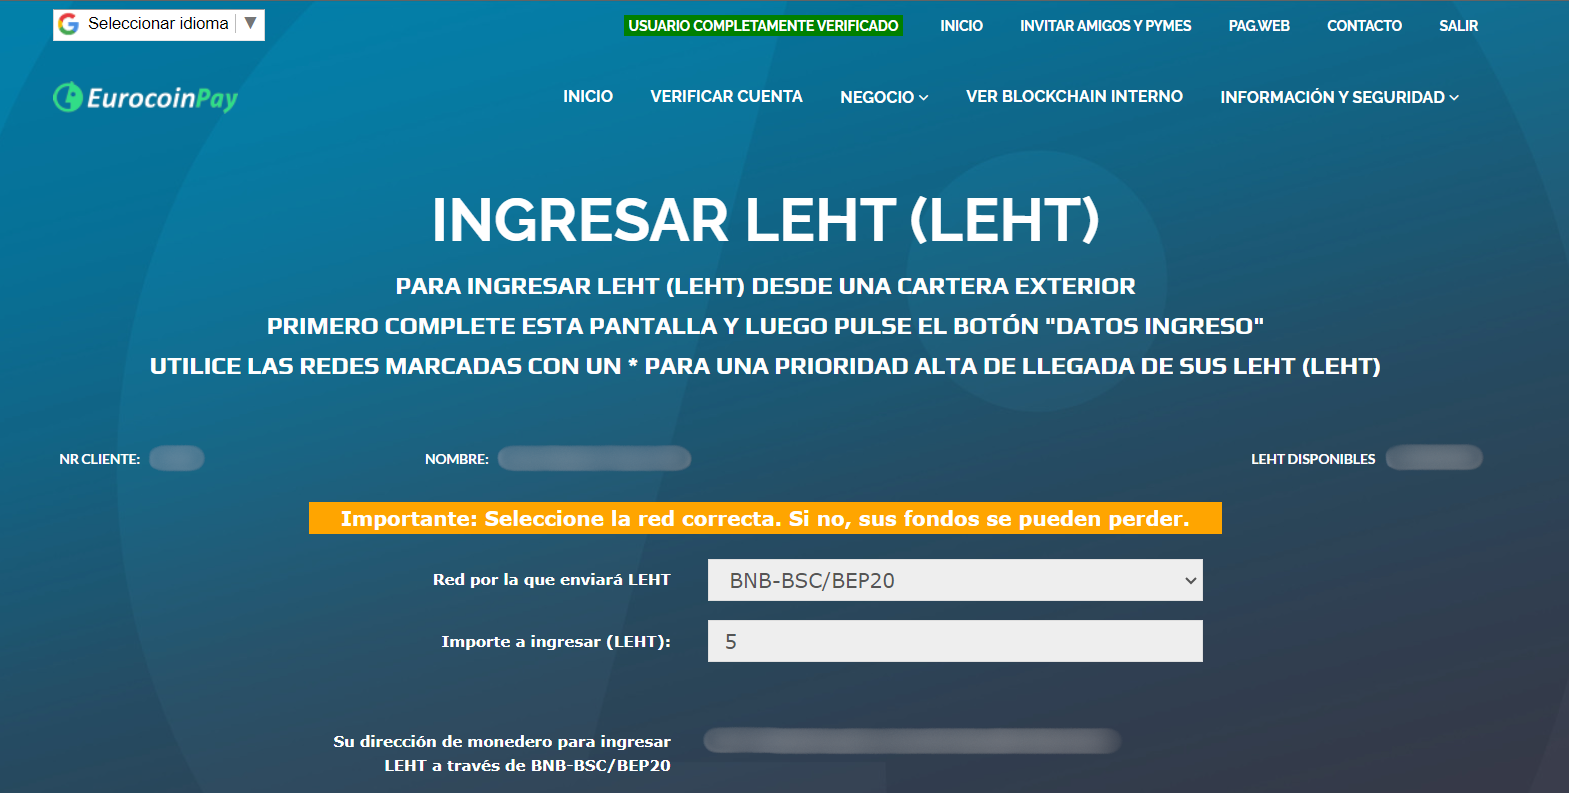
Step 8: To perform an operation such as entering Leht for example, select the corresponding option in the navigation menu and follow the instructions provided on the screen. You must select the network and the amount to be entered.
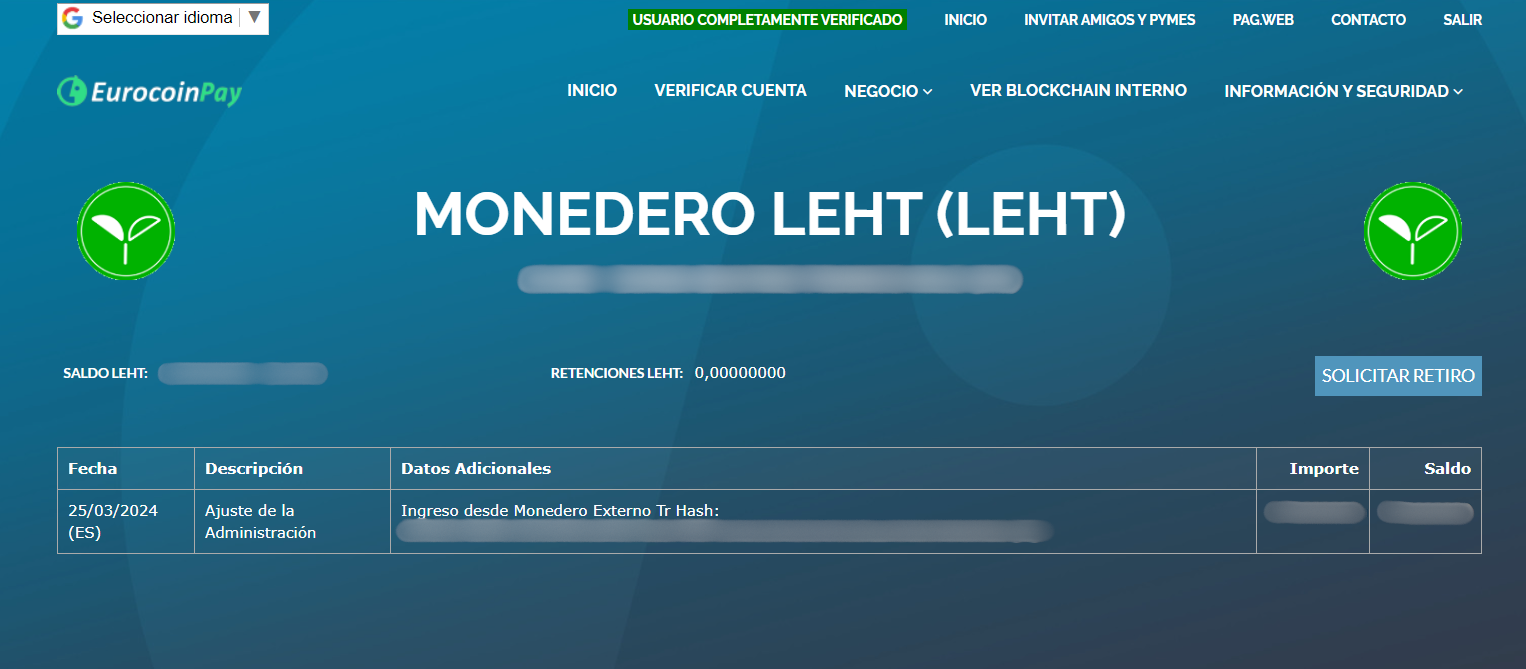
Step 9: Once you have entered the necessary information for the transaction, make sure to copy the address well and access your external wallet, e.g. Metamask or Trust Wallet, and complete the transaction.
Step 10: After some time, review your portfolio and in the Details option you will see all the information such as date, description, amount and balance.
Finally, remember that the support in the lower left corner is available at all times.
And that’s it! You are now ready to create an account and trade on EurocoinPay. Remember to always keep your login credentials secure and watch out for any security messages provided by the platform.
Artículos relacionados